Step-by-step instructions from Raspberry Pi installation to initial setup
Before starting installation, please prepare the following items.
AIBOX OS also runs on the Raspberry Pi 4; however, its performance is lower compared to the Raspberry Pi 5.As a result, processing loads may increase, and AI detection tasks may fail to operate properly.
Please choose a high-speed microSD card. Class 10 or higher, and A1/A2 specification if possible, is recommended. Using a slow card may result in degraded performance.
Download the AIBOX OS image file.
It is recommended to check the SHA256 hash value to confirm the downloaded file is not corrupted.
Get-FileHash aicapture_20251009.img.zip -Algorithm SHA256
sha256sum aicapture_20251009.img.zip
Please confirm that the displayed hash value matches the value listed on the download page.
Write the downloaded OS image to the microSD card.
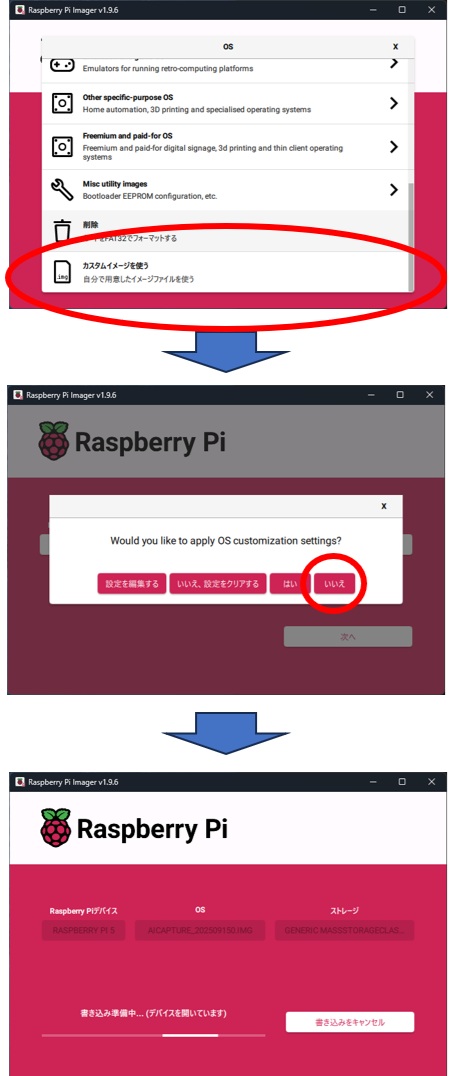
All data on the microSD card will be erased during the writing process. Please backup any necessary data beforehand.
After writing completes, safely eject the card. The writing process takes approximately 5-15 minutes.
Insert the written microSD card into the Raspberry Pi and boot it.
When booted successfully, the LED will change from red to steady green. If it remains red, please check that the microSD card is properly inserted.
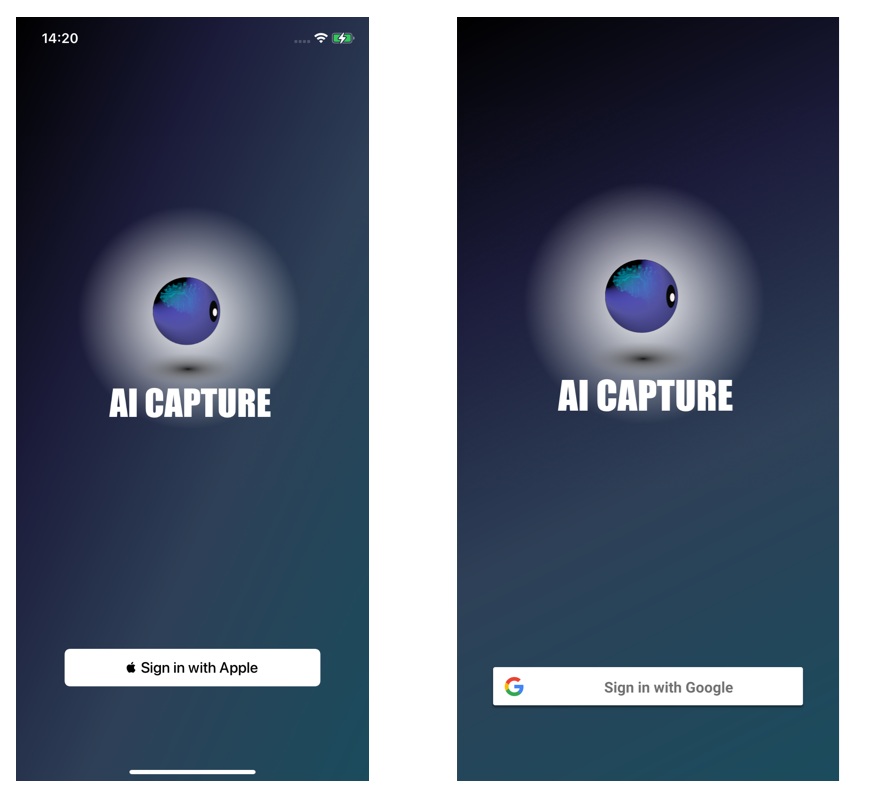
Install the dedicated "AI CAPTURE" app to control AIBOX from your smartphone.


After app installation completes, launch the app and sign in with your Google Account / Apple ID
When you launch the mobile app and sign in, the cloud initial setup screen will be displayed.
Tap "Run Cloud Initial Setup" to perform the cloud initial setup.
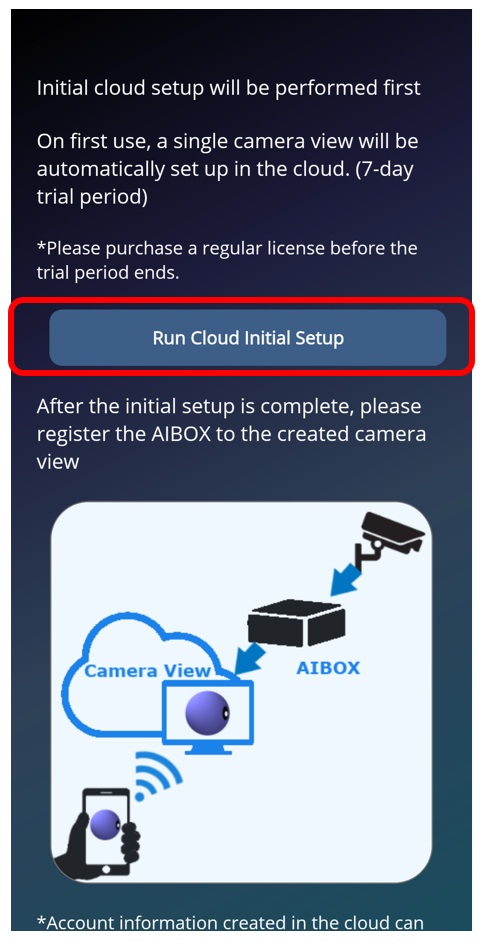
Do not close the app until the initial setup is complete. Keep it open. (Takes approximately 1 minute)
When initial setup completes, one camera view with a 7-day trial license will be added. (First time only)
Register your AIBOX to this added camera view.
A Camera View is a display frame that shows the video from a registered camera.
One AIBOX is required for each camera view. (If you have 2 camera views, you need 2 AIBOXes)
Camera connection information is saved as camera view settings, and the registered AIBOX reads those settings to connect to the camera and stream/record video.
When you connect AIBOX and your smartphone to the same network (LAN), the AIBOX will be displayed. Select it and tap "Register".
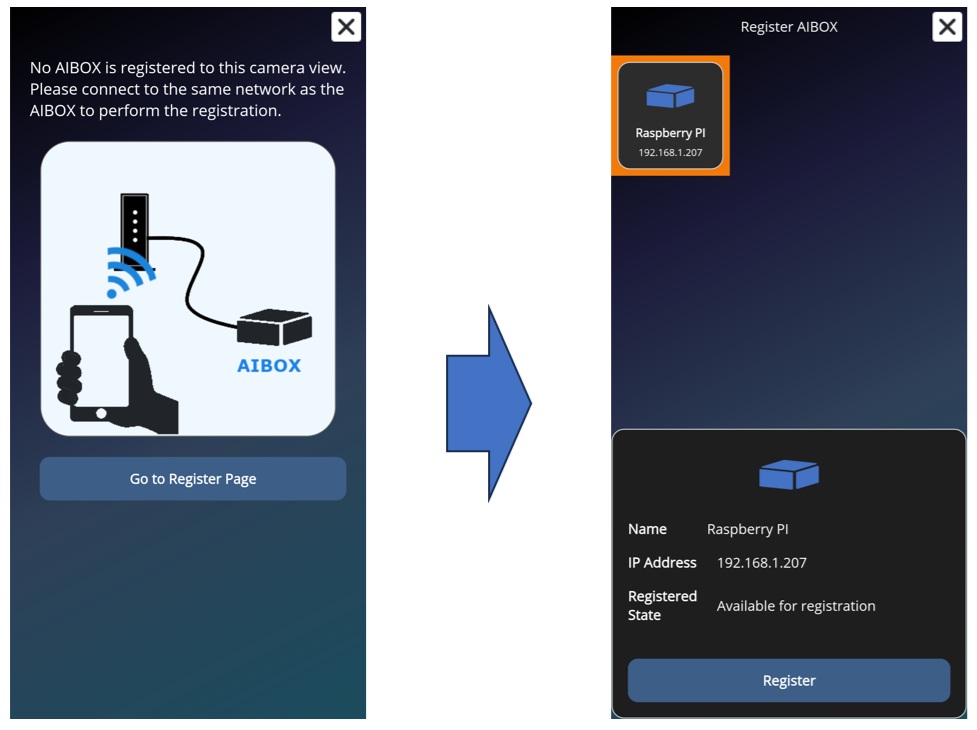
After registration completes, your smartphone and AIBOX do not need to be on the same network. They only need to be on the same network during the registration process.
Configure camera connection information for your registered camera view. The setup method differs depending on the camera type.
Select the camera type you want to connect from "Connection Method" and follow the procedures below.
Setup procedure when using a USB webcam.
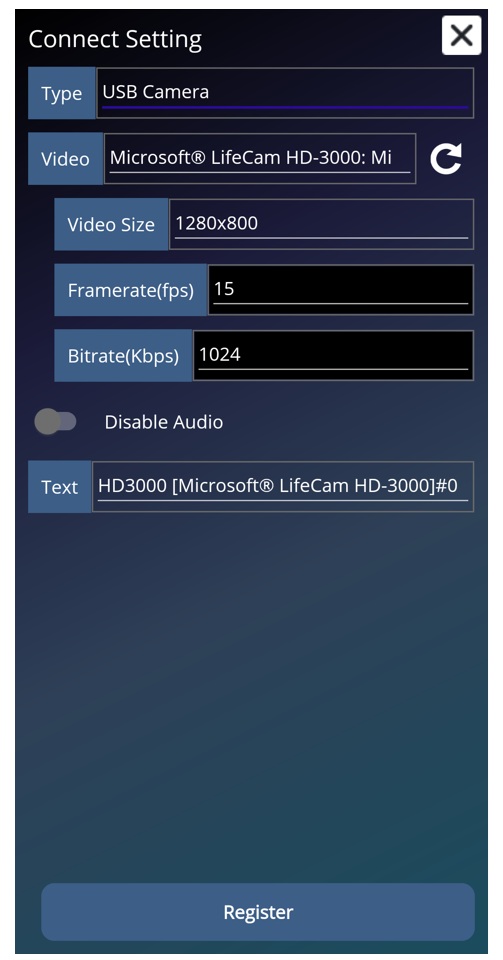
When camera connection setup completes, live video will be displayed in the camera view!
Setup procedure for auto-detecting and connecting IP cameras that support the ONVIF protocol.

ONVIF is a standard specification for IP cameras. ONVIF-compatible cameras can be automatically detected and connected regardless of manufacturer or model. Please confirm that ONVIF is enabled in your camera settings.
If the IP camera complies with ONVIF PTZ specifications, PTZ control buttons will be displayed on the live view screen.
If the camera video compression is H.265, the image may be distorted. Please change the camera settings to H.264, or turn ON "Enable H.264 Transcode" in the app settings screen.
However, enabling H.264 transcode increases AIBOX processing load, so please select a profile with lower resolution and frame rate from the camera stream when possible.
When camera connection setup completes, live video will be displayed in the camera view!
Setup procedure when connecting an IP camera via RTSP protocol.
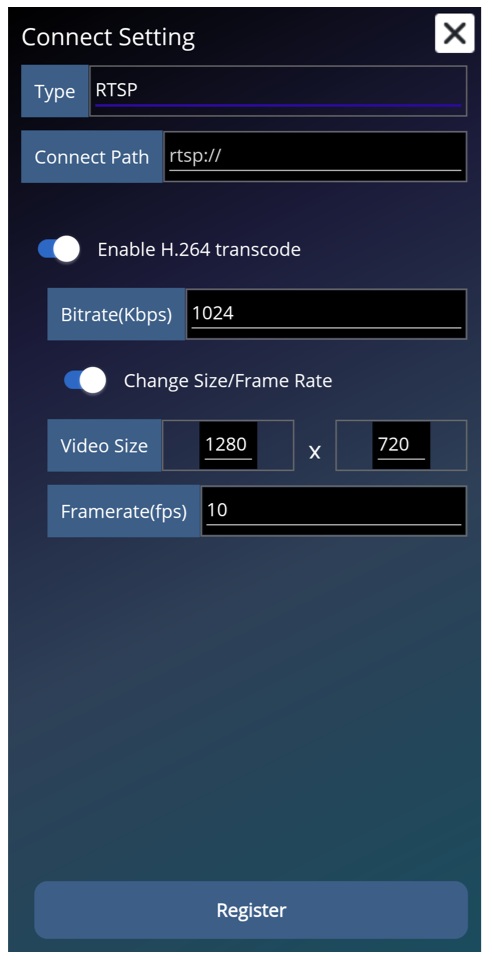
rtsp://admin:123456@192.168.1.100:554/stream1
The RTSP URL format is as follows:
RTSP URL ports and paths vary by camera manufacturer and model. Please check your camera's manual or manufacturer's website.
If the camera video compression is H.265, the image may be distorted. Please change the camera settings to H.264, or turn ON "Enable H.264 Transcode" in the app settings screen.
However, enabling H.264 transcode increases AIBOX processing load, so please select a profile with lower resolution and frame rate from the camera stream when possible.
When camera connection setup completes, live video will be displayed in the camera view!
Finally, check whether there are any updates for AIBOX OS.
Open the settings screen and verify the version information under Registered AIBOX Information.
If an update is available, it will be displayed in red. Press the "Update" button to perform the AIBOX OS update.
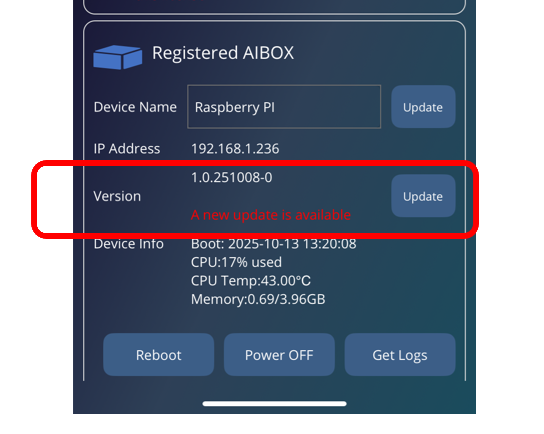
During the update process, AIBOX may restart several times. Please do not turn off the power until the update is complete.
Setup is complete! Let’s start using the app right away.