This page explains how to configure the cloud storage used as the recording destination.
Video data handled by AI CAPTURE is saved directly to the specified cloud storage. Therefore, recording cannot be performed unless a recording destination cloud storage is configured.
The stored data includes not only video files, but also video thumbnail images and detection images sent via push notifications.
*Push notifications can be sent even if no recording destination cloud storage is set, but detection images will not be displayed.

Please configure the recording destination cloud storage before starting recording.
Recorded data is saved directly to the configured cloud storage. We do not store, manage, or view any recorded data.
Please review the AI CAPTURE Terms of Service and the terms of the selected cloud storage service carefully. Management, protection, and backup of recorded data are entirely the responsibility of the customer.
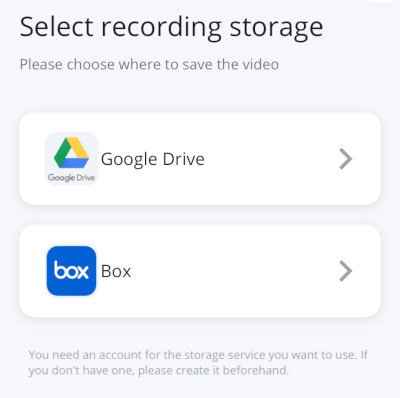
The following cloud storage services are supported by AI CAPTURE. If you do not have an account, please create one in advance.
 Google Drive
A cloud storage service provided by Google.
The free storage quota is 15GB, shared with other Google services such as Gmail and Google Photos.
The paid plan, Google One, allows expansion from 100GB up to several TB.
A Google account is required. (If you already have one, you can use it.)
Create a Google Account Box
Box
A cloud storage service with strong features for enterprise and team use.
The free plan provides 10GB of storage. Paid plans support large to unlimited storage capacity.
Create a Box AccountAll services can be used for free. Start with the free storage capacity and consider upgrading to a paid plan if needed.
Cloud storage usage fees are not included in the AI CAPTURE service fee.
After creating an account, launch the mobile app and open the Settings screen.
Tap the "Setting" button for the recording destination, then select the cloud storage service you want to use.
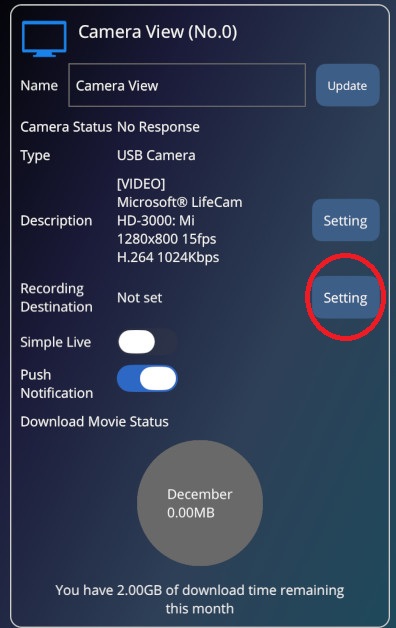
If a recording destination is already set, the storage capacity settings screen will open. To change the destination, tap the "Change" button.
When you select a storage service, a browser will open. After signing in, grant the required permissions to AI CAPTURE.
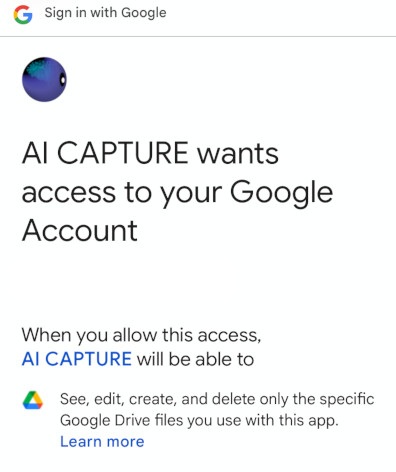
Google Drive permission screen
If sign-in fails, try signing in to the storage service in your browser beforehand.
Once permission is granted successfully, the recording destination setup is complete.
The default recording capacity is set to 90% of the available storage space. You can change this value as needed.
*For Google Drive, storage capacity cannot be retrieved, so the default is set to 1GB.
With a recording destination set, tap the "Setting" button to open the recording capacity settings screen.
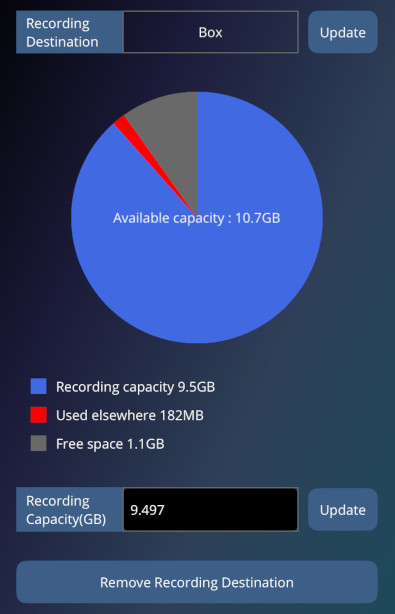
*Pie chart is not displayed for Google Drive
Enter the desired Recording Capacity (GB) and tap "Update" to apply the change.
The size of the recorded data depends on the camera's video bitrate.
For example, if you continuously record 1 hour of video from a camera with a bitrate of 1 Mbps, approximately 450 MB of storage will be required.
For USB cameras, the video bitrate can be set in the app's settings screen. For ONVIF or RTSP cameras, please adjust the video bitrate directly on the camera itself.
If recorded data exceeds the configured capacity, older data will be deleted automatically.
To change the recording destination, tap the "Change" button next to the destination. To remove it, tap "Delete this recording destination".
Even if you change or delete the recording destination, existing recorded data will remain in the cloud storage but cannot be played back in the app.
After setting the recording destination, try recording.
With AIBOX registration and camera setup completed, tap the "REC" button at the top left of the main screen to start recording. Tap again to stop.
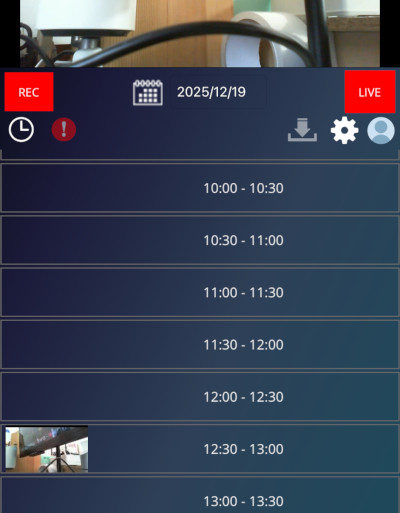
When a thumbnail appears in the recorded video list, select it and try playback. If playback works, the setup is complete.
If the recording time is too short, playback may fail. Wait about one minute and try again.
Sign in to the selected cloud storage service and check how the recorded data is stored.
If recording was successful, a folder named "AICAPTURE" will be created in the root directory.
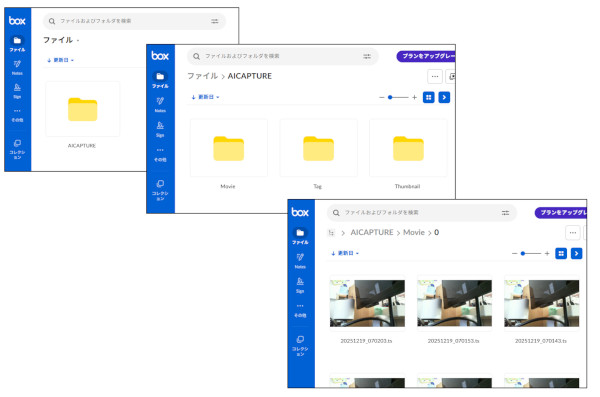
The folder structure is as follows:
Under each Movie / Thumbnail / Tag folder, a folder for each camera number (starting from 0) is created.
Do not modify the contents under the AICAPTURE folder while it is set as the recording destination, otherwise playback in the app will no longer be available.