How to create your own custom AI detection program!
Ensure that the setup is completed in advance and that the camera feed can be viewed on the smartphone app.
Connect a display and keyboard to the AIBOX (Raspberry Pi 5).
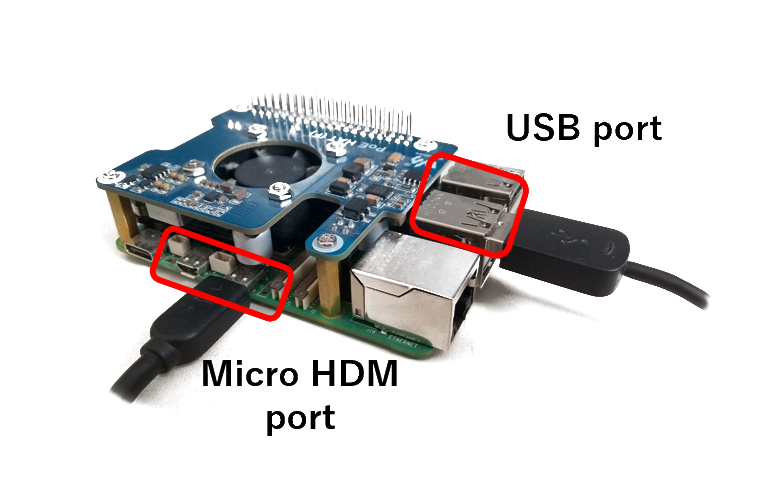
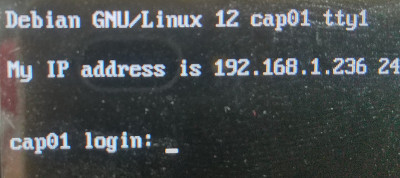
AIBOX OS is based on Raspberry Pi OS (Lite), so it does not provide a graphical desktop environment. Instead, it boots to a command-line login interface.
Log in to the AIBOX using the following account:
Username: cap
Password: cap
AIBOX OS is based on Raspberry Pi OS, so basic operations and settings are the same.
However, except for /home, the system uses a RAM disk. Before making OS changes, you must disable the RAM disk using the ramdisk command.
A RAM disk overlays a writable memory area on top of the read-only SD card, creating a virtual disk in memory.
Writing operations happen in RAM, extending SD card lifespan. The system can power off directly without shutdown and still boot cleanly next time.
Any changes made during RAM disk mode are lost on power off, returning to the original SD card state on next boot.
Built-in command to enable or disable RAM disk.
Before changing OS settings (password, SSH, WiFi, etc.), run the following to disable the RAM disk. (AIBOX will reboot)
sudo ramdisk disable
After changes, re-enable the RAM disk. (AIBOX will reboot)
sudo ramdisk enable
To ensure security and enable remote development, you should configure settings such as changing the default password, enabling SSH access, and setting up a Wi-Fi connection as necessary.
※Follow the usual Raspberry Pi OS procedure for these settings.
Once ready, try sending a push notification to your smartphone.
Execute the following one-liner in the shell:
aicap push
You should receive the notification on your smartphone.
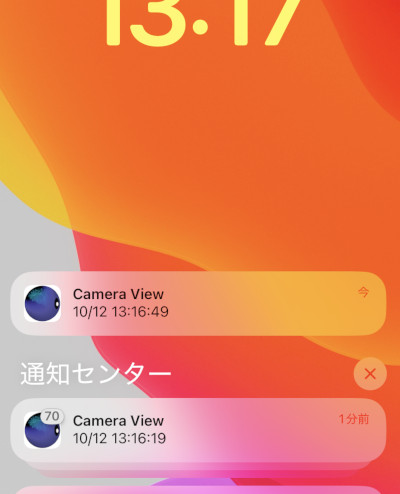
Tapping the notification will launch the AI CAPTURE app and display the camera feed.
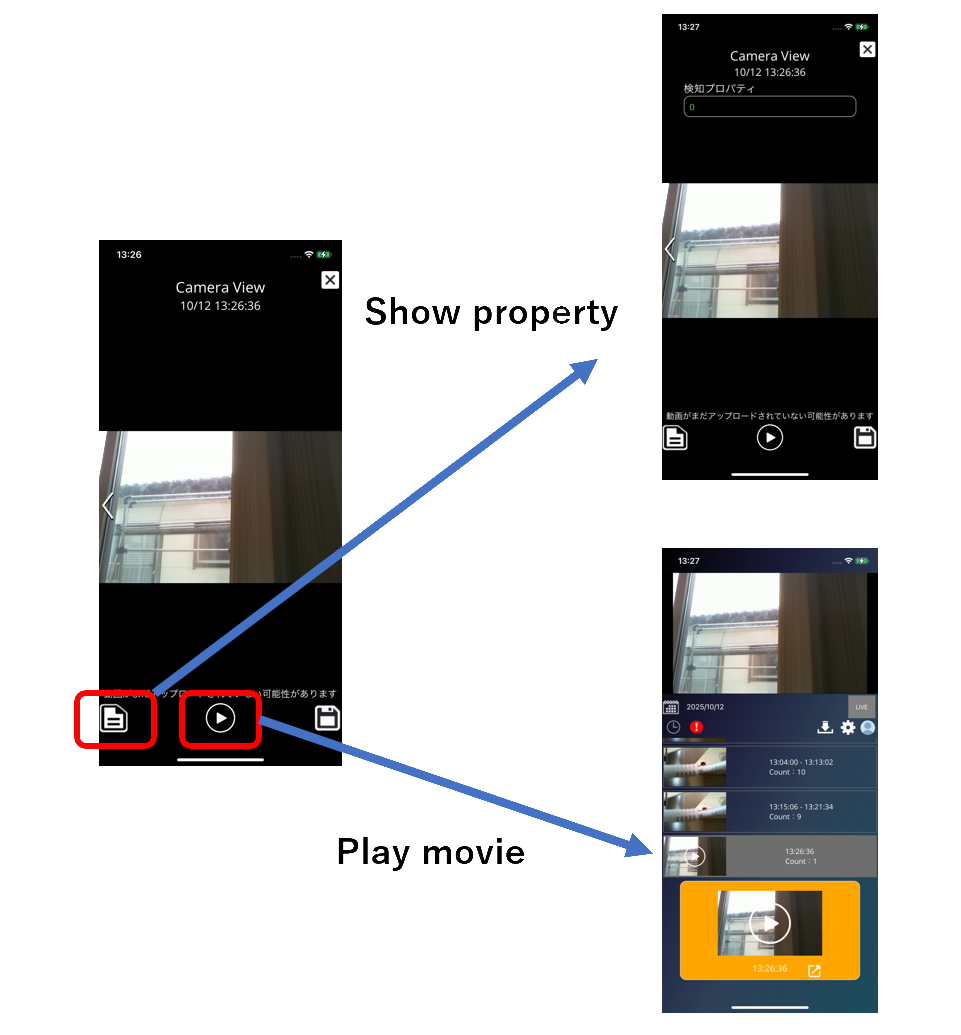
The aicap push command sends not only the notification but also JSON parameters specified in the command. Press the property button in the app to view them. Here, no parameters are specified, so an empty object ({}) is shown.
The timestamp of the aicap push command is also tagged on the recorded video. Press the play button in the app to start playback from 5 seconds before the push.
Although the push notification is sent immediately, it may take about a minute for the recorded video to upload and be playable. If playback fails immediately, wait a moment and try again.
Tags and sent images are saved in the cloud along with the recorded video for later review.
When the video retention period expires, tags and images are also deleted. The retention period depends on the camera license type.
You can integrate the aicap command into scripts or programs to build a monitoring system that interacts with external sensors or custom detection logic. JSON parameters can include sensor values or detection data for verification.
AIBOX provides a location to place detection programs as shown below.
/home/cap/aicap/extmod
Locations under /home are not on the RAM disk, so you do not need to disable the RAM disk before making changes.
By default, object detection programs using YOLO are placed in this folder.
Refer here for more information about YOLO
There are several files, but the two files required for placing your own detection program are as follows:
| File Name | Description |
|---|---|
| start.sh | Shell script called when AIBOX main program starts (requires execute permission) |
| stop.sh | Shell script called when AIBOX main program stops (requires execute permission) |
These shell scripts are called together when the AIBOX main program (capture.service) is started or stopped by systemd.
To deploy your own detection program, include the program’s start/stop commands in these shell scripts so that the program starts and stops automatically.
As a sample, let's create a shell script that sends a Push notification every 10 seconds, and place it in AIBOX.
The program is as follows:
#!/bin/sh

while true; do
    echo "★★★★ aicap push at $(date) ★★★★"

    aicap push -J '{"param1" : "TEST PUSH!"}'

    # wait 10 seconds
    sleep 10
done
First, back up the current extmod folder.
cd /home/cap/aicap # move to aicap folder
cp -r ./extmod ./extmod.back # copy extmod to extmod.back
Next, delete all files and folders in extmod except start.sh and stop.sh.
cd extmod
rm -r docker-compose.yml extmod.py yolo11m.torchscript yolo11m_ncnn_model
Open an editor (nano), paste this code, and save it as sample.sh in the program folder.
nano ./sample.sh
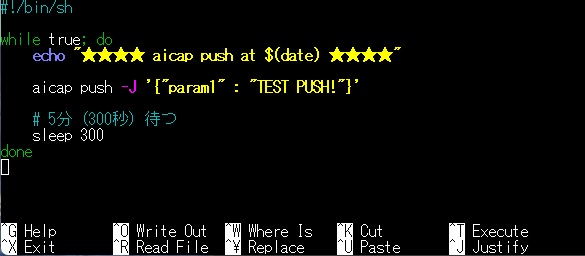
In nano, press Ctrl+O to save and Ctrl+X to exit.
Grant execute permission to sample.sh.
chmod +x ./sample.sh
Run sample.sh and check if Push notifications are sent to your phone.
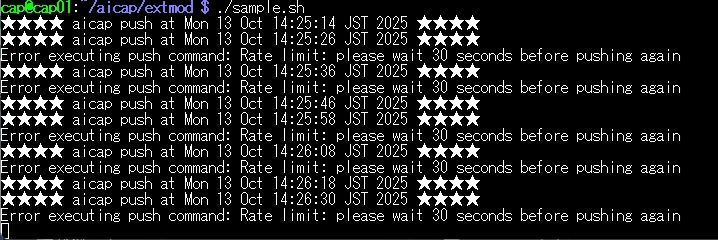
If Push notifications appear on your phone, the test is successful!
However, you may see errors in the shell output.
Error executing push command: Rate limit: please wait 30 seconds before pushing again
The aicap push command requires a 30-second interval between consecutive pushes to reduce server load.
Since this sample runs the command every 10 seconds, this error occurs. It will execute correctly after 30 seconds, so this is not a problem.
Once you confirm the program runs correctly, stop the program with Ctrl+C.
Finally, set the program to start and stop automatically.
Use nano to edit start.sh and stop.sh to include commands to start and stop sample.sh in the background.
#!/bin/sh

set -e

# move to extmod directory
EXTMOD_DIR=$(cd "$(dirname "$0")" && pwd)
cd "$EXTMOD_DIR"

# start sample.sh in the background
./sample.sh &
#!/bin/sh

# move to extmod directory
EXTMOD_DIR=$(cd "$(dirname "$0")" && pwd)
cd "$EXTMOD_DIR"

# stop sample.sh
pkill -f sample.sh
After that, reboot AIBOX OS and verify the operation.
If everything is correct, Push notifications should appear on your phone every 30 seconds.